
Step 1
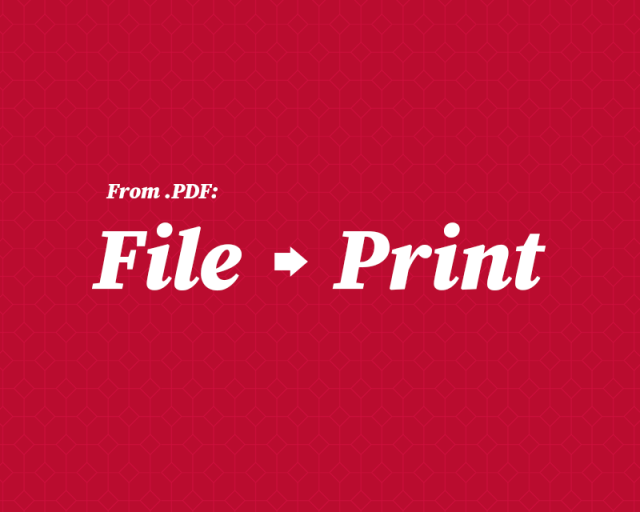
- Log into a library desktop computer (do not use a personal computer).
- DOWNLOAD the document you would like printed to the downloads folder or to the desktop.
- Open your document with the ADOBE ACROBAT READER desktop application (right click on the document, go to open with, and then select Adobe Acrobat), for best results.
- Go to FILE and PRINT.
Step 2
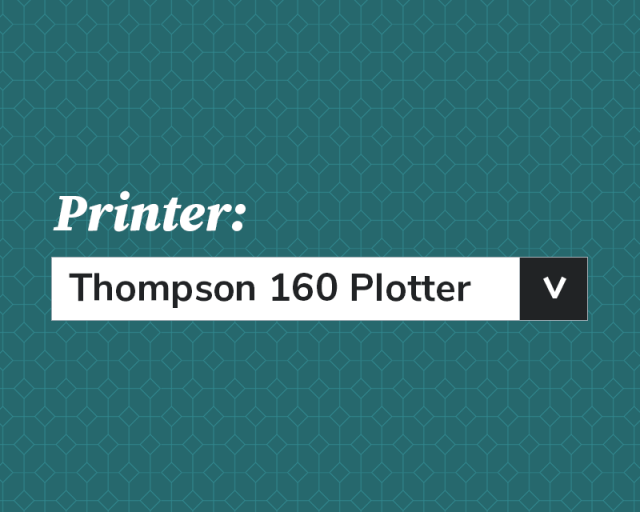
- Open the CHANGE THE PRINTER dropdown menu, click SEE MORE and choose THOMPSON 160 PLOTTER.
- Click FIT.
Step 3
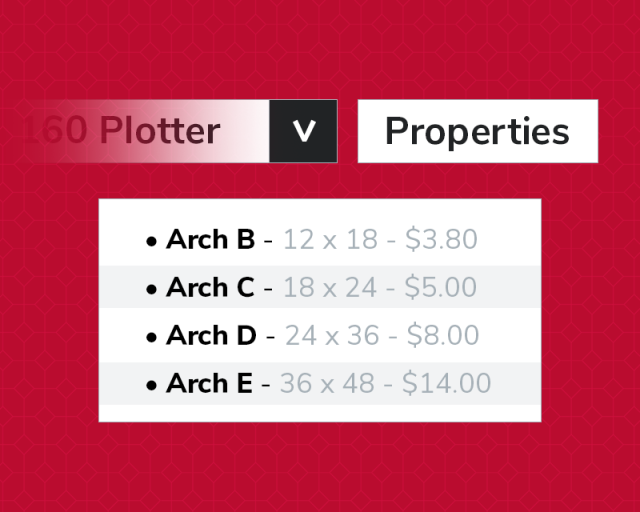
- Click the PROPERTIES button.
- Click SEE MORE within the dropdown menu to choose the size of your poster.
- DO NOT SELECT OVERSIZE ARCH. Ensure the option begins with "Arch _"
- Arch B - 12" x 18" - $3.50
- Arch C - 18" x 24" - $5.00
- Arch D - 24" x 36" - $8.00
- Arch E - 36" x 48" - $14.00
Step 4
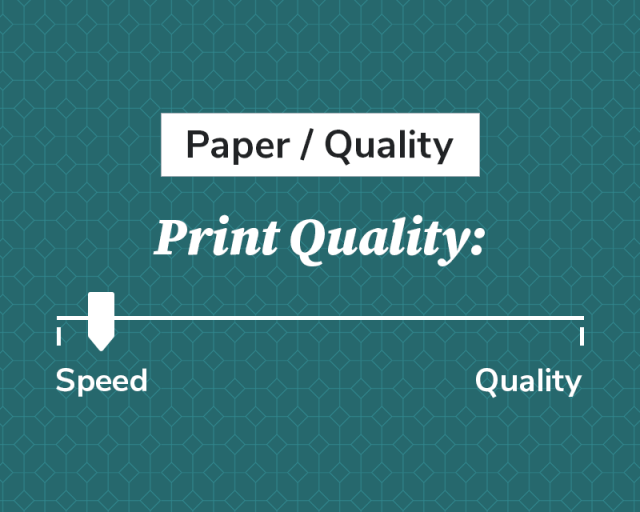
- Click the PAPER / QUALITY tab.
- Move print quality speed to the MIDDLE of the print quality bar to ensure a quality print.
- Adjust the print quality slider from SPEED to QUALITY for large blocks of red or high quality images, including details graphs and QR codes.
Step 5
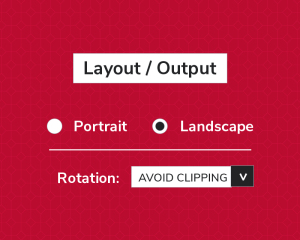
- Click the LAYOUT / OUTPUT tab and set the rotation to ROTATION: AVOID CLIPPING.
Step 6
- Click OK, then click PRINT. Type your last name.#.
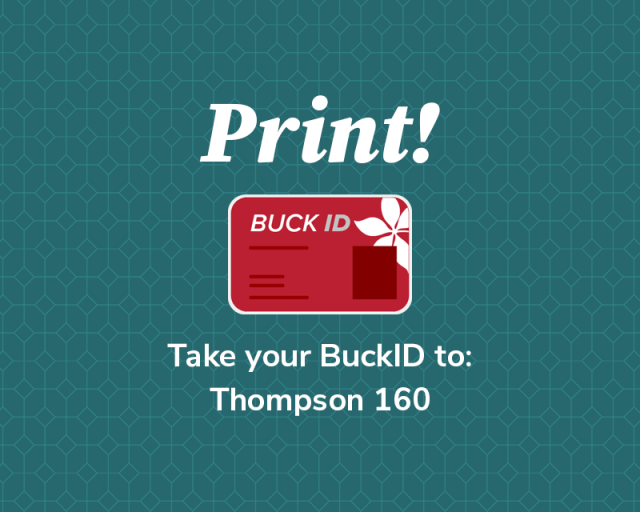
- Posters can be printed at the plotter printers in THOMPSON 160. Swipe your BuckID or type in your last name.# to release the poster.
Frequently Asked Questions
While attempting to print my poster, the plotter ran out of paper. What do I need to do?
Confirm you have the required funds on your BuckID to complete the second print job. Resubmit your print job at a public PC following the poster printing instructions. Use the other plotter printer when attempting to print again. Request a refund for the failed print job.
Can I use my credit or debit card to pay for poster printing?
No, the only accepted payment method for Student Lab Printing is via BuckID. Visit https://buckid.osu.edu/, click on manage your account, deposit options and make an online deposit.
I have an issue with my print job, how do I request a refund?
When attempting to print my poster, parts of my file printed, and other text boxes did not. What went wrong?
Text or images can be lost when saving the poster various ways. Our suggestion is to go back to your original file created. Save this file to the downloads folder on the PC or to the desktop. From there, minimize your internet browser and open the file with Adobe Acrobat (right click on the document and open with adobe acrobat) for best results.
I am at the plotter, and after swiping my BuckID, the cost of poster says $15,000. What went wrong?
Our poster printing steps were not followed correctly. Please make sure all steps are followed to ensure a great customer experience.